Disclaimer: Warning Serious problems might occur if you modify the registry incorrectly by using Registry Editor or by using another method. Modify the registry at your own risk, Every effort has been made to ensure that registry edit instructions are correct and safe. MyPCHell cannot be held responsible for any damage done to your system by using this guide.
Before beginning this guide, please do this
Click ![]() then
then ![]()
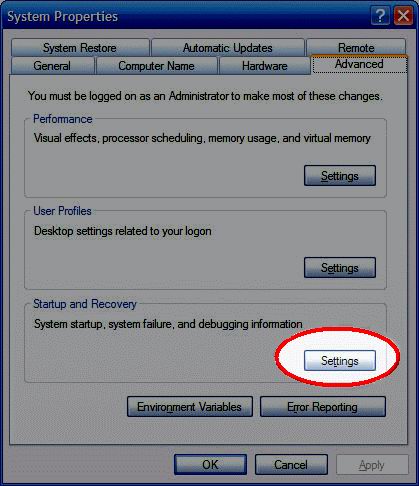
Type control sysdm.cpl,,3 then click ![]() (note: alternatively, you could Go to your Control Panel, and then choose System)
(note: alternatively, you could Go to your Control Panel, and then choose System)
Then under Startup and Recovery click on Settings

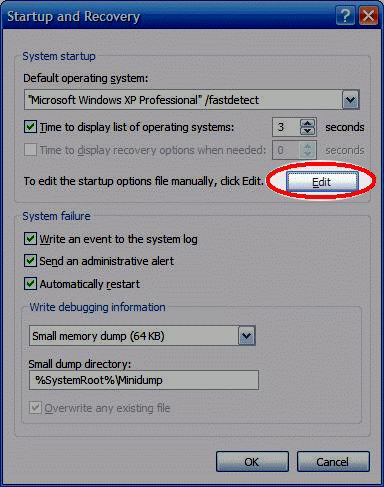
Then Click on Edit

Now highlight the current boot line and then right click and select Copy (for more clarification, see the below pic. Click On Pic to Enlarge)

Place your cursor on the next line (you may have to hit your enter key to get to the next line) and then right click and select Paste Then add the word ‘Safeboot after ‘Windows XP Professional’ (for more clarification, see the below pic. Click On Pic to Enlarge)

Now Click File then Save
Now, Click ![]() then
then ![]()
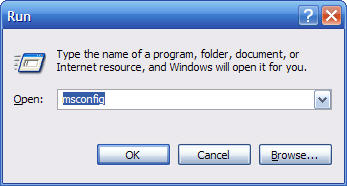
Type msconfig then click ![]()

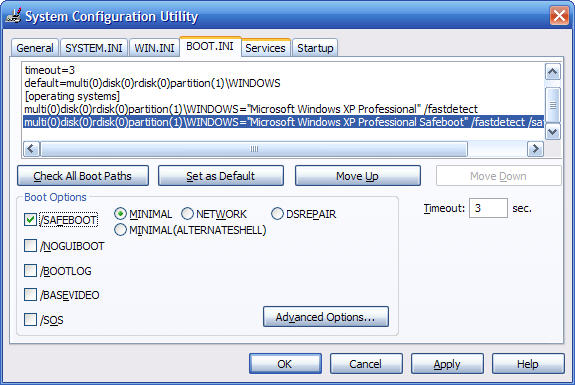
Click on the Boot.ini tab, then you will see an identical version of what you had in your Boot.ini file. Use your mouse and click on the bottom line (the one that has the word ‘Safeboot’), then check mark the box next to /SAFEBOOT. You can then choose what options you want:
- Minimal - Minimal set of drivers
- Network - With Network Support
- Dsrepair - Directory Services Repair
- Minimal (Alternate Shell) - Standard Explorer Desktop

Click Apply and reboot. You should now see a screen during the boot process that allows you to select to boot into Safe Mode